Table of content
Check a file in or out of a SharePoint library
Check out a file from a SharePoint library
Check in a file to a SharePoint library
Change the location where you work on checked-outfiles
Undo check-out and discard changes in a SharePoint library
Open or edit a file in a SharePoint library
Open a file from a SharePoint site
Edit a file by opening it from a SharePoint site
Upload a file to a SharePoint library
Save a file to a SharePoint library
Working with major and minor versions
How versioning works with content approval
How versioning works with file check-out
Launching a document from SharePoint
This software is an client application for windows computers. It connects AutoCAD, AutoCAD LT, TrueView, Design Review and other applications to Microsoft SharePoint Online..
The application runs in the background and is located in the system tray
area.
In order to permanently display the application on the tray area, do the next:
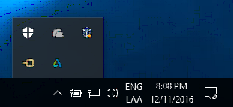
For Windows 10/11
1. Customize whether an icon appears on your taskbar or this tray by dragging
and dropping the application icon between the two areas.
2. Access more detailed setting by right-clicking the taskbar and selecting “Settings”.
For Windows 7 and 8
1. Click on the tray area up arrow and select Customize as shown in the next
image
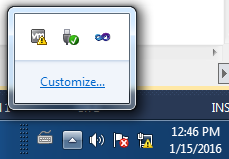
2. Set the application so it will be displayed always in the tray area by selecting "Show icon and notifications".
![]() Shows the last opened files, it give you the option
to open a file by double clicking its url address it. Also give you the
available SharePoint operations you can execute as follows:
Shows the last opened files, it give you the option
to open a file by double clicking its url address it. Also give you the
available SharePoint operations you can execute as follows:
![]() Opens the selected file from the SharePoint document library. See also
Open or edit a file in a
SharePoint library and Openning a file
Opens the selected file from the SharePoint document library. See also
Open or edit a file in a
SharePoint library and Openning a file
![]() Allows to save the selected file to a SharePoint
document library. See also
Save a file to a SharePoint library
Allows to save the selected file to a SharePoint
document library. See also
Save a file to a SharePoint library
![]() Checks in the selected file. See also Check in a file to a SharePoint library
Checks in the selected file. See also Check in a file to a SharePoint library
![]() Checks out the selected file. See also Check out a file
Checks out the selected file. See also Check out a file
![]() Undo or discard the
selected checked out file. See also
Undo check-out and discard
changes in a SharePoint library
Undo or discard the
selected checked out file. See also
Undo check-out and discard
changes in a SharePoint library
![]() Display your selected file SharePoint properties.
Display your selected file SharePoint properties.
![]() Display your file version store in your SharePoint document library. See also
Introduction to versioning
Display your file version store in your SharePoint document library. See also
Introduction to versioning
![]() Opens a
dialog which enables to see all your SharePoint drawing references, and related
information. See also Working
with external references
Opens a
dialog which enables to see all your SharePoint drawing references, and related
information. See also Working
with external references
![]() Opens a dialog form which enables to open files stored in
your SharePoint document library. See also
Open or edit a file in a
SharePoint library and Openning a file. This dialog has the next icons
Opens a dialog form which enables to open files stored in
your SharePoint document library. See also
Open or edit a file in a
SharePoint library and Openning a file. This dialog has the next icons
The
![]() called Flat View was introduced to overcome 5K file view limitation and it will
allow to search for files which metadata is registered as "managed property".
More information about managed properties can be found at
https://docs.microsoft.com/en-us/sharepoint/technical-reference/automatically-created-managed-properties-in-sharepoint
called Flat View was introduced to overcome 5K file view limitation and it will
allow to search for files which metadata is registered as "managed property".
More information about managed properties can be found at
https://docs.microsoft.com/en-us/sharepoint/technical-reference/automatically-created-managed-properties-in-sharepoint
The path location will be remembered next time you
open a file. To save file locations, you can add to your
favorites by clicking the ![]() button and navigate
to them by using the
button and navigate
to them by using the ![]() button
button
The
![]() called Quick View was introduced to be able to
navigate fast using the latest SharePoint tools, it gives the document status like checked out by and locked by. You can
open and save files using this view.
called Quick View was introduced to be able to
navigate fast using the latest SharePoint tools, it gives the document status like checked out by and locked by. You can
open and save files using this view.
![]() Opens a dialog form which enables to upload a file to a
SharePoint document library. See also
Save a file to a SharePoint library
Opens a dialog form which enables to upload a file to a
SharePoint document library. See also
Save a file to a SharePoint library
 Opens the
Options dialogs to set up the application preferences. This have the next
options:
Opens the
Options dialogs to set up the application preferences. This have the next
options:
Work Mode: It will allow you to select between working checked out file from the server (default Online option) or locally (Offline option). For a better description see Change the location where you work on checked-out files
Open Checked-in files as read only: When openning a checked-in file, it is opened as read-only by default. To open a checked-in document for editing by default, uncheck this option. Note that by unchecking this option the document will be locked by you as long as it is opened, also checked-in files are always opened as read-only if the document library - Versioning Settings - "Require documents to be checked out before they can be edited?" is set to Yes.
Check out and Open: It will automatically check out a document if possible before opening it. Note, it will not check out the document to a draft location if selected.
Auto Check-In on Close: It will automatically check in the document as a minor version when the checked out document is closed.
Use a single folder for working files
Check this option if you receive errors because of a long path. All opened
documents and their external references will be downloaded in the same local
folder. See notes in Known limitations
section.
Use MSAL Authentication
Use MSAL (Microsoft Authentication Library) Authentication if your SharePoint tenant requires this type of authentication.
section.
Add a SharePoint network location
This will open a browse folder dialog to select a particular folder that will add a shortcut to the SharePoint folder. Using this shortcut will enable applications to open/save files using the application regular open/save dialogs. Use this option only for specific cases like mapping external references or other operations not available with this application. SharePoint access using this link may lead to file corruption since it does not have the reliability of the native SharePoint check-in/out file locking control.
 Exits the
application. Note: Temporal local files will be deleted.
Exits the
application. Note: Temporal local files will be deleted.
Check a file in or out of a SharePoint library
Checking out files before working on them helps to avoid conflicts
and confusion when multiple people are working on the same set of files. When a
file is checked out to you, only you can make changes to it. You can check out
any file on a SharePoint site for which you have permission, and you can check
out files using this application.
When you check in a file, you can type comments about the
changes that you made to the file. This helps people to
understand what has changed in the file from version to
version. This is especially helpful if several people work on
a file or if the file is likely to go through several
revisions. If your library tracks versions of files, your
comments become a part of the version history of the file,
which can be helpful if people need to view or restore a
previous version.
Your organization may require you to check out a file before
you edit it. When check-out is required, you must check in a
new file when you create it in a library or upload it to a
library.
While a file is checked out to you, the changes that you make
are not visible to others until you check the file back in.
There may be situations in which you want to check in the
file so that others can see your changes, but you want to
keep the file checked out so that you can continue working on
it. When you check in a file, you can choose to continue
working on the file, unless your library tracks both major
and minor versions and you are checking in a major version. A
major version usually has changed significantly since the
previous major version, whereas a minor version usually has
changed only slightly since the previous version. For
example, a major version may include a large portion of new
content, whereas a minor version may include only corrections
to spelling errors.
When you use this application to check out a file on a Microsoft Windows SharePoint
Foundation/Server site, the file can be stored on your hard disk in a drafts folder that
is in your My Documents folder. You can change this location
to another location on your hard disk or network, or you can
specify that checked-out files are stored on the Web server
when you work on them.
When you check out a file from a Microsoft Windows SharePoint Foundation/Server site, the file is stored on the server while you
work on it, but you must still check in the file before
others can see your changes. In most cases, when you check
out a file from a Windows SharePoint Foundation/Server site,
your file will be stored in your draft folder specified
in the Options menu. While files are being tracked,
you may be prompted to choose whether you are checking in a
major version or a minor version.
Top of Page
Check out a file from a SharePoint library
Use this procedure to check out a file. You can also check out a file from
the library on the SharePoint site.
Note: File needs to be closed to get the latest copy from the server.
On the menu, click Check Out or
push ![]() on the ribbon.
on the ribbon.
Tip You can change the options for working with checked-out files, located in
the Option menu.
Top of Page
Check in a file to a SharePoint library
Use this procedure to check
in a file. You can also check in a file from the library
on the SharePoint site.
Note: File needs to be close to perform this operation, before closing it, make
sure you save the file so it will be checked in with the lastest copy.
On the menu, click Check In or
push ![]() on the
ribbon.
on the
ribbon.
If you are prompted whether to check in a major or minor
version, click Minor version if you made a minor change or
Major version if you made a major change.
In the Version Comments box, type any comments that you want
to make about your changes.
These comments appear as part of the version history for the
file in the SharePoint library, which can be helpful if you
or someone else needs to view information about previous
versions.
Top of Page
Undo check-out and discard changes in a SharePoint library
On the application menu, click Discard Check
Out or select
![]() .
.
When you are asked whether you want to discard the check-out,
click Yes.
Tip: You can also discard the check-out by using commands in the
library on the SharePoint site.
See Also
Check a file in or out of a SharePoint library
Open or edit a file in a SharePoint library
Save a file to a SharePoint library
Working with external references
This application lists the external references saved in a SharePoint site. For a complete description of this plugin external reference manager see also External Reference Manager
External references saved in SharePoint can have the next path conventions.Relative paths are partially specified folder paths that assume the current drive letter or the folder of the host drawing. This is the most flexible option, and enables you to move a set of drawings from your current drive to a different drive that uses the same folder structure.
The conventions for specifying a relative folder path are as follows:
./path
From the folder of the host drawing, follow the specified path
../path
From the folder of the host drawing, move up one folder level and follow the specified path
../../path
From the folder of the host drawing, move up two folder levels and follow the specified path
Note If a drawing that contains referenced files is moved or saved to a different SharePoint folder, you must edit any relative paths to accommodate the host drawing's new location or you must relocate the referenced files.
An absolute path is a fully specified hierarchy of folders that locates the file reference. An absolute path is a complete URL address. This is the most specific but least flexible option.
Access to the reference manager by clicking on the
icon
The application reference manager will display in a tree view all your current drawing external references comming from a SharePoint site or any other web location. By moving on external reference or host icons , you can get information like status (checked in/out, checked out offline, checked out by other, etc), url location and saved path. If you right click on the icon, it will allow to do the following operations:
Refresh: Will update the status and the rest of the external references information shown when the mouse is on top of each tree node.
Open: This will open the host to ease SharePoint document library operations.
Properties: The SharePoint properties form for the selected file are displayed for editing if it is allowed.
Reload: This will allow to download a copy of the external reference saved in your SharePoint library. This is usefull to update your local copy and watch the changes, if a host is selected, it will close, download and open the host file if required.
Check in/out: It will check the selected external reference out if it is checked in and viceversa. This option is only available when the document is closed.
Add Drawing: It will allow to add the selected external reference file as a host. Usefull to perform operations on nested external references.
Other operations can be perform by clicking on the next icons
It will allow to choose a SharePoint drawing and add it to the tree panel. Usefull to see drawings simultaneously.
It adds all the existing drawings from the selected SharePoint folder to the tree node panel. This operation can take long time depending on the amount of drawings on the Sharepoint folder.
Change the location where you work on checked-out files
This setting changes the location where you work on
the next file that you check out. If you are currently
working on a checked-out file, this procedure does not change
its location.
Open the Options - Work Mode - Offline and click on the Change Offline Folder.
Browse and select the new folder location, the default location is
c:\User\myUserName\Documents\SharePoint Drafts
Note: To be able to use this location for your checked out files, you need to
select the Offline work mode.
Top of Page
Open or edit a file in a SharePoint library
Checking out files to work on them
If multiple people work on the same files, you may want to
check out files before you work on them. When you check out a
file, you are the only person who can change it while it is
checked out to you. This reduces the potential for confusion
or editing conflicts. A file must be checked in before other
people can see the changes.
A library can be set up so that it requires check-out. When a
library requires check-out, you must check out files before
editing them. New files must be checked in before other
people can see them.
Working with files on your hard disk
When you check out a file and the file is in
a library on a Windows SharePoint Foundation/Server site, you can work with the
file on your hard disk. In most cases, this is faster than working
with the file on a server. The file is stored in the server drafts folder on
your hard disk; you can change this location through the options for saving in
the Options menu.
When you check out a file to your server drafts folder, you can even work with a
file when you aren't connected, such as when you are away from the office. When
you are connected again, you can update your changes on the server. If you
checked out the file, you need to check in the file to enable other people to
see your changes.
Open a file from a SharePoint site
Note: Your site may be customized differently, but you can use the
following guideline in most cases to determine which version of Windows
SharePoint Foundation/Server is running on the site: On a Windows SharePoint
Foundation/Server site, a menu with your user name or account appears in
the upper-right corner.
On the SharePoint site, open the library where your file is located.
What to do if you can't find your library
If the name of your library does not appear, do the
following:
On a Windows SharePoint Foundation/Server site, click View All
Site Content.
Click the name of your list.
Click on the file link.
Top of Page
. You can also check out a file
from the library on the SharePoint site.
On the application menu, click Check Out or select
![]()
Top of Page
Edit a file by opening it from a SharePoint site
To open a file from a Windows SharePoint Foundation/Server site, you
can just click the file.
Note: If you the option above does not work, follow the instructions from the
application Readme file, make sure
you have administrative privileges on the SharePoint
server.
Top of Page
Click the Open icon.
If you have not open a file previously, type the document library entire path, e.g. http://servername/Document Library name.
This path location will be remembered next time you
open a file. To save file locations, you can add to your
favorites by clicking the ![]() button and navigate
to them by using the
button and navigate
to them by using the ![]() button.
button.
Once you have navigated to the document library, select the file and hit the Open button.
Tip: The last 10 files that have been opened or saved are listed in the file
name box, just click the chevron on the right to display the recent documents,
select the one needed and hit the Open/Save button.
You can also open and search for files by clicking on the
![]() button. Searches are made to every SharePoint document text property used by the
document library default view. Type several words to narrow your search. If you need to look for an exact phrase, enclose your search words with
double quotes e.g. "My document".
button. Searches are made to every SharePoint document text property used by the
document library default view. Type several words to narrow your search. If you need to look for an exact phrase, enclose your search words with
double quotes e.g. "My document".
Save a file to a SharePoint library
A SharePoint site or document management server can
provide a central location for people to manage and track
files. For example, you can use a SharePoint library to
manage versions of files, store additional information about
files, and receive updates when the files change. Some
document management servers also provide workflow features to
help manage business processes, such as review and approval.
This application provides an option to make it easier to find
your available SharePoint libraries, saving to a library is
similar to saving to any network or Web location.
To save a file to a SharePoint site, you must have
permission to contribute to the SharePoint site. Other people
in your group also need permission to read or contribute. For
example, to save a file to a document library on a SharePoint
site, you need to have permission to contribute to the
library.
When you save a file, you may be prompted to provide
additional information or perform other actions, depending on
how your site or server is set up. For example, you may need
to enter information about the file, such as your department
name or the content type of the file. For more information,
see the administrator or owner of your site.
If a file is checked out to you, which means that only you
can make changes to it during check-out, you must check the
file back in before other people can see your changes. If
your library tracks major and minor versions, you are
prompted when you check in the file to specify whether you
are checking in a major version or a minor version. A major
version usually has changed significantly since the previous
major version; whereas a minor version usually has changed
only slightly since the previous version. For example, a
major version may include a large portion of new content,
whereas a minor version may include only corrections to
spelling errors.
Depending on how your library is set up, you may have
additional steps to take before you make your files visible
to others. For example, you may need to specify information
about the file, or your file may need to be approved before
it is visible to everyone in your group.
In addition to saving a file directly to a SharePoint
library, you can also save the file to your hard disk and
then save or upload it later to a library or another Web
location.
Top of Page
Upload a file to a SharePoint library
The following procedure is for uploading your file to a
SharePoint library.
Click on the Upload button
![]()
Locate your local file, select it and hit Open.
A Save dialog will be opened where you can browse for your SharePoint library
location. Hit the save button to place the file in the selected document library
folder.
Top of Page
Versioning enables you to store, track, and restore items in a list and files in
a library as they are changed. Access the file version history by selecting the
file on the Recent - Versions
![]()
When versions are tracked for lists or libraries, revisions to the items or files and their properties are stored. This enables you to better manage content as it is revised and even to restore a previous version — for example, if you make a mistake in the current version. Versioning is especially helpful when several people work together on projects, or when information goes through several stages of development and review.
You can use versioning to do the following:
- Record a version history When versioning is enabled, you can see when an item or file was changed and who changed it. You can also see when properties, or information about the file, were changed. For example, if someone changes the due date of a list item, that information appears in the version history. For files, you also see comments that people include about their changes.
- Restore a previous version as your current version Did you make a mistake in a current version? Or perhaps you need to restore part of a document that you deleted. You can easily replace your current version with a previous version. Your current version then becomes part of the version history.
- View a previous version: You can view a previous version — for example, to refer to a previous guideline — without overwriting your current version.
Libraries can track both major versions, such as those to which a new section was added, and minor versions, such as those in which a spelling error was corrected. Lists can track only major versions. Lists and libraries can also limit the number of versions that people can store.
To enable versioning, you must have permission to design a list or library.
Top of Page
When versions are createdWhen versioning is enabled, versions are created in the following situations:
- When a list item or file is first created or when a file is uploaded.
Note: If file check-out is required, the file must first be checked in, in order to create its first version.
- When a file is uploaded that has the same name as an existing file and the Add as a new version to existing files check box is selected.
- When the properties of a list item or file are changed.
- When a file is opened, edited, and saved. A version is created when you first click Save. This version is updated with the latest changes that you make to the file before closing it.
Note: A version is not created every time that you or another user clicks Save, because this would create too many versions.
- When a file is checked out, changed, and then checked back in.
Note: If you or another user discards the checked-out version, no version is created.
You can choose to delete a single version of a file — for example, if you know that you made a mistake in that version — which removes that version from the version history. However, if you delete the actual file, all of its versions are deleted with it. By default, when you delete a version, the version is sent to the Recycle Bin, where it can be recovered until it is permanently deleted. Your organization may handle deletions differently, however.
Important: If your organization limits the number of versions that it stores, the oldest versions are permanently deleted when the limit is reached. They are not sent to the Recycle Bin.
Working with major and minor versions
Depending on the needs of your organization, your library may be set up with simple versioning, which tracks only major versions, or it may track both major and minor versions. If people in your group don't often work on several revisions, your organization may only need simple versioning. If many people work on files together and usually create several versions, your organization may want to track both major and minor versions.
Providing two types of versions can help your team to better manage its content. People who work with the content can better understand the current status of a file. For example, a major version is usually one that is ready for a larger group to see and review, whereas a minor version is a draft that someone is still working on.
Tracking both kinds of versions also helps to make the version history more meaningful. A major version is more likely to represent a milestone in the file's development, such as when a file is submitted for review or distributed to others. A minor version is typically used as a routine increment, such as a version that you save or check in while you are still writing the content, or a version in which you correct some minor errors. When you want to view the version history of a file, the major versions may help you to identify the stages of the file's development and make the history easier to browse through.
When major and minor versions are tracked, a version is stored by default as a minor version, unless you designate the version as a major version. When you save a file and close it, the version is tracked as a minor version. You must first publish the file in order for it to become a major version. You can publish the file by using drop-down commands in a library. In some programs that are compatible with Microsoft Window SharePoint Foundation/Server, you can also use commands in the program. By default, each major version can have up to 511 drafts (minor versions), but the site administrator or owner can further limit the number of versions.If youIf you have permission to delete versions, you can overwrite a minor version with another minor version. For example, you may want to overwrite a version if you know that the previous version contains an error and you don't need to keep it. If you publish a major version and then realize that you made a mistake, you can turn the version into a minor version again by unpublishing it.
If you check out files before working on them, you can designate which type of version you are checking in. You do not have to publish a file if you designate it as a major version when you check it in.
Versions are numbered as you create them. In a list or in a library with simple versioning enabled, version 1 is the first version that you create or upload, and the version number increases by increments of whole numbers, as in version 2, version 3, and so on.
When you track major and minor versions, the major versions are whole numbers, and the minor versions are decimals. For example, 0.1 is the first minor version of a file, 1.3 is the third minor version of a file that was published once, and 2.0 is the second major version of a published file.
1- The current published major version is highlighted, and the version number is a whole number.
2- A version is created when properties or metadata changes.
3- The first version of a file is always minor version number 0.1.
In a list or library, you can display a Version column that displays the version number of files or list items, which can be helpful if your team frequently revises information.
How versioning works with content approval
Major and minor versioning integrates with content approval for lists and libraries.
When content approval is required, a list item or file remains in a draft or pending state until it is approved or rejected by someone who has permission to approve it. If the item or file is approved, it is assigned an Approved status in the list or library, and it is displayed to anyone with permission to view the list or library. If the item or file is rejected, it remains in a pending state and is visible only to the people with permission to view drafts.
When you enable major and minor versioning in a library that requires content approval, you can also add a workflow, if you or someone in your organization has created one. A workflow controls how your files move through business processes, such as review or approval. You can use a workflow to manage the approval process when major versions are checked in.
By default, in a library that tracks both major and minor versions, you must first publish a major version of a file before it can be approved. Minor versions are considered drafts that are still being developed, so they don't appear as pending items that are waiting for approval.
For example, a travel agency might use a document library to manage files. While team members develop a new sales proposal, they track minor versions of the file. If they make a mistake in one version, they can restore it to a previous version. When they finish the proposal, they can create a major version and then publish it for approval by their legal department and their manager. When the file is approved, other employees in the company can view the file.
By default, a pending item or file is visible only to its creator and to the people with permission to approve items, but you can specify whether other groups of users can view the item or file.
When content approval is required, the people who have permission to read content but who do not have permission to see draft items will see the last approved or major version of the list item or file. If major and minor versions are tracked in a library and no one has published a major version yet, the file will not be visible for the people who do not have permission to see draft items..
How versioning works with file check-out
Checking out files make the most of versioning. When you check out a file, a version is created only when you check the file back in, so that you can specifically designate when a version is created. When check-out is not required, a version is created when you first save a file, and then this version is updated when you close it. If you open and save the file again, another version is created. Depending on the situation, you might not intend for multiple versions to be created, for example, if you have to close a file to attend a meeting before you finish making changes to the file.
When check-out is required, you cannot add a file, change a file, or change the file's properties without first checking out the file. When you check in the file, you are prompted to provide comments about the changes that you made, which helps to create a more meaningful version history.
External references download
If the external reference is not found in the relative SharePoint saved location and the external reference is in the same SharePoint folder where the host is, it will be downloaded and placed where the host drawing is temporarily downloaded. This way the external reference will be loaded by the host drawing.
Special characters:
Saving documents with file names that contains characters like # or & are
not allowed.This is a SharePoint limitation, for a complete description see
http://support.microsoft.com/kb/905231
External references not loaded for AutoCAD files:
CADtoWIN LT cannot load external references mapped to url absolute
locations i.e. the one starting with "http://...", use relative paths instead
Underlays (Dwf, Dgn and Pdf) will not be loaded if mapped in a
SharePoint location
When the "Use a single folder for working files" option is activated:
1. Cannot "save as" a file
located in SharePoint using the same name. Workaround, save the file under a
different name.
2. External references which saved path is too
long may not load. Workaround, move it closer to host location and attach them
using relative path.
1. In order to launch the right file application, it should be configured as a default application. To do it, rigtht click on a local file and select "Open with" then "Choose default program..." and select the desired application, check also "Always use the selected ......" . This will allow CADtoWIN LT to launch the right application for the file. Note, for the case of dwg files, the "AutoCAD DWG launcher" may be the one selected as a default, change this one to AutoCAD, AutoCAD LT, Trueview or Design Review to allow the drawing's external references to be downloaded automatically from the SharePoint location.
Using Onedrive to sync the files files you are working with this plugin in SharePoint is not recommended. Lost of work may happens. See https://knowledge.autodesk.com/support/autocad/troubleshooting/caas/sfdcarticles/sfdcarticles/Conflict-copies-of-drawing-files-saved-from-AutoCAD-are-created-in-OneDrive-synced-network-drives.html